The Kanger TOGO Mini is the new All In One Starter Kit that addresses the shortcomings of ultra compact AIOs by packing in a tremendous tank capacity of 3.8 milliliters powered by a direct voltage based output. Based directly from the CUPTI and Argo platforms, Kanger's TOGO Mini maintains the side by side.design while integrating a premium textured finish. Ultra compact in size, the TOGO Mini squeezes in an ample 1600 mAh integrated battery that is charged at a maximal rate of 1A to ensure minimal downtime. Output of the TOGO Mini features a direct voltage output based on resistance and battery state, with a minimum atomizer resistance of 0.15 ohms. The system gives feedback off of a minimalist LED battery screen consisting of five vertically arranged LEDs that provide battery life. The tank system of the TOGO Mini sits directly adjacent to the chipset, with a maximum tank capacity of 3.8 milliliters, filled via a threaded top fill system. The coil structure utilized within is the tried and true CLOCC family that debuted with the CUPTI platform, and included in each set is a 0.5 ohm SS316L coil and a 1.0 ohm NiChrome MTL coil, catering to a well balanced and flavor orientated output, respectively. Compact without sacrificing range and capacity, Kanger's TOGO Mini All In One Starter Kit is an excellent platform for users looking for a simple to operate, consistent, and all day pocketable system.
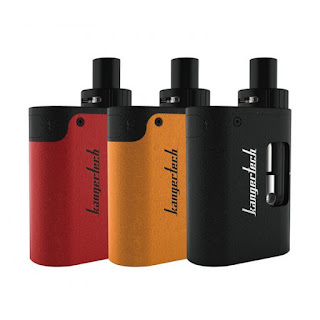
It is in stock at our store, only $25.90 you can get one .
Home » Archives for February 2017
How to use CUPTI properly
in
CUPTI,
How,
How to use,
kanger,
Kanger Cupti,
Kanger Cupti Starter Kit,
kangertech
- on 7:51 PM
- No comments
1. 5 speedy clicks to switch on/off the battery.
2. After switched on, LCD displays “KANGER TECH” at standby mode.
3. Press fire button 3 times, choose your resistance wire, Ni 200, Ti SS, NiCr or Pure wattage output.
4. For pure Ni200, Ti, SS or NiCr resistance wire, you can set your desired coil temperature to fit your taste.
5. For power output mode, set your desired working wattage that best fits you.
6. Press (+), (-) together to choose LCD display orientation.
7. Press (+), (-) and fire button all together, this can lock the up and down button once you have best setting by pressing the entire buttons together.
8. In case you change the coil or vape in other environment or presetting, you may need to calibrate the CUPTI atomizer as new coil : YES (+), NO (-) for best performance.
9. If no display of calibration:
a. Screw down the CLOCC.
b. Press the fire button till LCD displays "Check Atomizer".
c. Screw back the SUBDRIP and press fire button again.
If you have any questions about CUPTI, you can visit www.kangerforum.com